
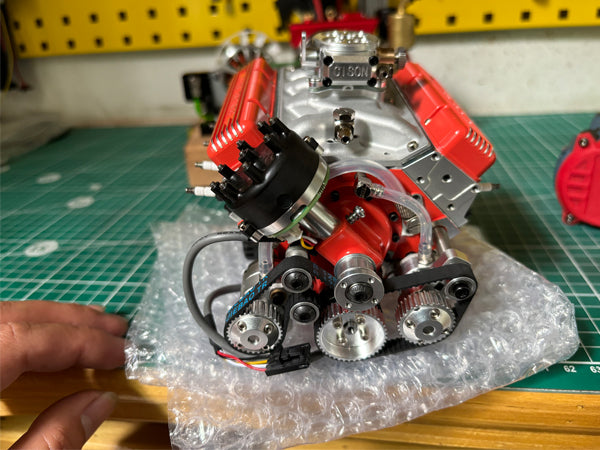
I received my Stirlingkit / Cison FL4-175 Accessories package today, and everything looks really nice. CDI has silicone wires, a strong plastic case, and looks to be filled with potting compound, the starter harness will be plug and play… The solder connections are covered with heat shrink tubing. Hall effect sensor wires have a protective cover, including the oil lines & fuel line, 40mm radiator & 12v cooling fan, wires for the starter motor, spark plugs, and a small fuel tank. Gonna start building my Cison FL4-175 Sunday.


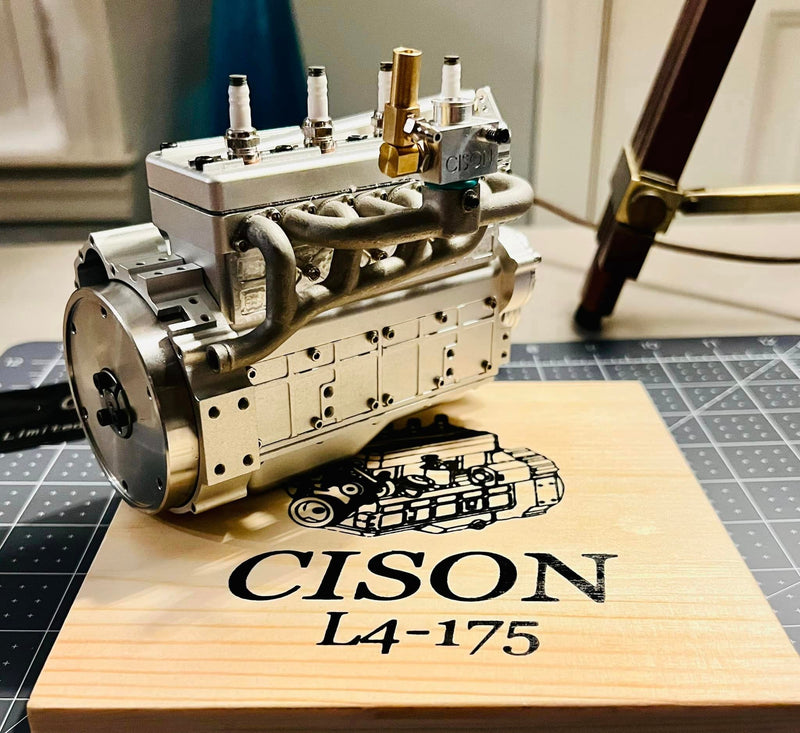
I bought my Stirlingkit Cison FL4-175 during the presale stage and was excited when I learned the engine was being offered in kit form as well as a pre-built version. Wow! What a beautifully presented kit! A sturdy wooden box securely protects the kit during shipping and holds separate layers of foam with numbered cut-outs for each engine component.

The assembly manual is in QR code format, which is really cool; it allows Cison to add and update info, address customers’ questions as well as post new videos relating to the Cison FL4-175.
Before assembling the Cison FL4-175, there are a few tools are needed for assembling the Cison FL4-175. A set of metric hex drivers and hex keys, a set of hobby-type tweezers, anaerobic glue aka Locktite / both low strength high temp and HT medium strength versions, a small metric nut driver, & measuring calipers. I also used HondaBond HT for an RTV sealer. The hobby tweezers will be your best friend and used throughout the build.
There are 2 small plastic numbered & sectioned containers that contain all the hardware, O-rings, and small parts for the Cison FL4-175. The containers also have stickers with illustrations of each part for each parts section. I was really impressed with these small details Cison put into the kit. These small details help assembly go smoothly, and helps prevent confusion about “which part is which?” or “what size am I supposed to use…?”


A magnetic tray also is helpful in keeping small metal parts & screws from getting lost, as well as a vinyl hobby mat as a workspace.

The QR code is nicely set up and is super easy to use. There is a numbered parts list, an engine assembly section, and an operation section. The assembly manual is extremely detailed with pictures of each step. I was really impressed with the level of detail Cison went into with the manual as well as their translations. Very complete & easy to understand.
After I received my kit, Cison posted an update on the QR link, explaining that they were not happy with some of the early production kit’s crankshaft quality. They said they weren’t as “perfect” as Cison wanted the crankshafts to be. Cison said that they have contracted a new machine shop to make the cranks, and will be replacing the crankshaft for the FL4–175 for affected customers. The fact they posted this, to make their customers aware, are taking care of it, and apologized is some awesome customer support.
Another major thing I noticed when I unpacked my kit was how Cison had numbered the intake and exhaust valves, as well as the connecting rods/crankshaft. When Cison puts together each kit, they have matched both the valves and the piston rods to the crankshaft. Definitely impressed at the level of precision with that they made this kit.
This ensures correct tolerances and fitment of engine components and precision. Applause to Cison!


The first steps are carburetor assembly and installing the O-rings into the engine block. The steps are very straightforward and the instructions on the steps are very well detailed. I used a little grease on the carburetor barrel and for installing the cylinder liner O-rings. This helps the sleeves slide in easily without gouging the O-ring seals.


The next step in assembly is the crankshaft installation. I was impressed with how well the center crankshaft fulcrum support fits the block. It’s machined to a very close tolerance and fitment. I liked how the center crankshaft support had numbers printed on one side to avoid the crankshaft center fulcrum support halves from being installed incorrectly. I also liked how the kid included shims for the crankshaft to take up any side-to-side movement that would stress the end ball bearings.


Camshaft timing gears are installed next. Just like the crankshaft, part fitments are very exact tolerances and shims are included for the ball bearing supported camshaft. The addition of tick-marks on the timing gears helps easily orientate correct timing.
The next steps in the assembly are installing the piston’s rings and connecting rods. I opted for the 2 metal piston rings without using the piston O-ring, to help the engine start easier during break-in and not put as much wear on the starter motor. Ring & connecting rod installation was my favorite part of the Cison FL4-175 build.

Starter Motor:
After reading that there have been issues with the starter motors on the Cison FL4-175, I removed my starter motor from my engine so I could do a motor break-in first, to seat the brushes to the commutator. I started with a 15-second warm-up at 6v, then ran the motor underwater at 6v for 30 seconds. Next, I ran the motor at 7.2v for 30 seconds underwater. I used an electric motor cleaner spray with gentle compressed air to clean it out, reinstalled the starter motor, added 17ml of 10-50w motor oil to the crankcase, and removed the spark plugs. I added a drip of 10-50w oil to each cylinder, and cranked the engine at 11.1v in 2-second intervals, 5 times, then let the starter motor cool completely. I did this sequence 2 more times, then installed 2 spark plugs, cranked, then added the other 2 plugs. I’ve tested the starter 4-5 times and the motor seems to crank the engine pretty effortlessly now.


Next, I installed the engine’s 8 valves, springs, and retainers. Hobby-specific tweezers make installing the tiny valve spring retaining clips simple; it would’ve been near impossible to install the retainers and clips with my fingers, lol.
I like how Cison made valve clearance adjustable. Clearance is adjusted by tightening the screw on the end of each valve tappet. I set my intake tappet length at 10.25mm, and the exhaust tappet length at 10mm using a digital caliper. I used a high temp medium-strength Loctite to set the screws.
The water pump & oil pump are assembled next. The water pump shaft has an actual oil seal and the shaft rides on a bronze bearing… The little impeller is CNC aluminum. The oil pump is a positive displacement gear pump. One thing in the assembly manual that I wasn’t sure of, was the elimination of a guide pin on the second driven oil pump gear. Cison notes that the pin has been removed from the kit, so I went ahead with the assembly of the oil pump. Before installing the oil pump, a used 2 clear hoses and turned the oil pump shaft with a cordless drill. Needless to say, the oil pump works very, very well. The exhaust and intake manifolds are beautiful on this little engine. The mating surfaces have been machined to seal & fit perfectly.
I added a 90-degree fitting to the breather hole on the valve train cover and will run a small hose & catch tank for oil vapor. This will prevent oil vapor or droplets from blowing on the intake & exhaust manifolds
Cison gives the buyer the option of using 1 or 2 head gaskets. For break-in, I chose to use 2 head gaskets until the engine gets a little time on it. The engine's Hall Effect sensor is a nicely made component, but I was concerned with the wires possibly being accidentally pulled off the solder pads, so before installing the Hall sensor I put some electronics potting compound around the solder joints to help secure them.
The accessories kit from Stirlingkit includes the Hall sensor, spark plugs, CDI, the plug-and-play starter wiring harness, the radiator overflow tank, cooling fan, and fuel & oil hoses. All that’s needed is an 11.1v lipo battery for the starter and a 7.2v battery for the CDI power.


Hoping in the next few days I’ll be able to do my first start on the Cison FL4-175! This was a really fun kit to build. To me, it’s much more fun to build an engine in kit form. This allows the owner to learn about how everything in the engine functions and how to repair it if needed.

Huge applause to Cison & Stirlingkit for producing the Cison FL4-175… I already know it will run and perform excellently!

All You Need to Know About CISON FL4-175 Flathead Inline 4 Engine | Stirlingkit
CISON FL4-175 FLAT HEAD ENGINE Full Review By Dennis
11 Practical Tips for Assembling a FL4-175 Engine Model | Stirlingkit


Can you get spare parts:
Starter motor ,starting ring gear