
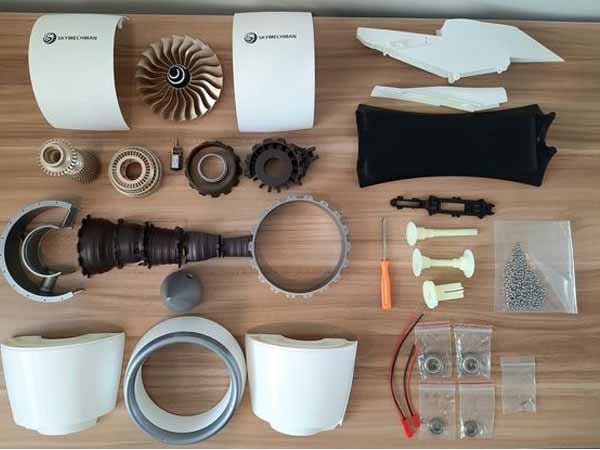
Something very exciting arrived in the mail today. as an aviation professional and enthusiast I wanted to have one of these jet model engines and decided to give SKYMECHMAN mini turbine a try.
The packaging and presentation are excellent. Parts are 3D printed and nicely prepared and painted. Comes with the screw driver needed and a USB drive for instructions and videos.
Stay tuned for a build and review post in case you are interested in buying it for yourself or as a gift
Let's start the build of SkyMechman NR900 Jet engine 🪛
PART 1:
⚠️Most important notes which will help you a lot!
1- Only watch the build video (on the USB stick) instead of the manual. I started building only looking at the manual as I realised it wasn't accurate. Watching the video helps significantly

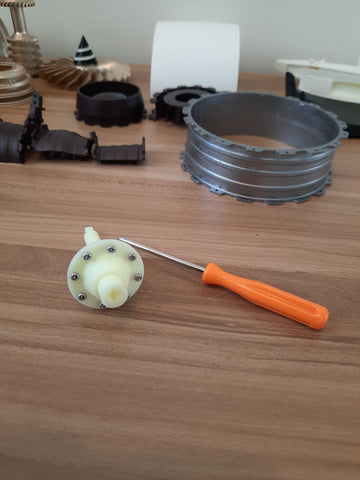
2- Assembly only uses self-threading screws with a provided screw drive. I recommend using a stronger screwdriver without a doubt. More importantly THREAD THE PARTS BEFORE ASSEMBLY. you will save a lot of muscle pressure and your fingers will thank me later haha. If you have one of those fancy electric micro drivers use them.
3- I use used bit of sewing machine ( or any tool oil ) to the tiny engine gearbox. I also used it on other moving parts. This engine requires a 12v power source. There is no switch and the wires will come out of the exhaust cone ( there is a hole in the bottom ). I'm planning to use the base it comes with to put a micro switch for turning it on and off .it feels half-finished.
4- the engine nose cone (aka. fan cone ) is originally black. But I noticed it has groves for the white stripe. So why not !? It adds a great presence and accuracy to the look.
5- since this is a 3D printed and painted plastic, preserve the paint and avoid wrapping the plastic parts in heat. I use a car paint protection spray to cover the parts and let them sit for 2 hours before starting you can use similar products or if you don't it still be fine but avoid direct sun or warm and humid places to store it
This particular model does not represent any specific brand or type of jet engine. Two-stage turbofan engine which still looks cool to display.
Assembling is easy once you watch the video about a couple of tricky parts. The cover section has 2 parts joining together side by side, I was confused at first following the manual document but the video cleared it up. I put a picture of the manual. It seems clear but it misled me.
When putting each section together, it is worth ensuring all the edges align properly otherwise it will cease the movement of fans. I must say, the fans don't much as freely as they should which is a shame. But once I assembled the whole thing. I will take it apart and sand then repaint it to make it move freely.
The paint on the parts is decent with minimal blemishes. Since it's 3D printed entirely, you don't get the molded plastic smoothness, so keep that in mind.
I am 50% towards completion, and will share the photos of the rest and outcome in another post


0 comments